The Exposure Triangle
When it comes to photography, light is everything. The word ‘photograph’ literally means “drawn with light.” In its most basic definition, a photograph is simply a recording of light on either film, or more commonly now, a digital sensor. For the purposes of this article I’ll be referring to a digital image sensor, although the principles remain the same for analog film. An “exposure” refers to the image created and how light or dark it is. Regardless of what type of camera you have, there are only three settings that affect the exposure of your image: shutter speed, aperture, and ISO. In this article, we take a look at each setting, how it affects your image, and how to attain a proper exposure in nearly any situation.
Shutter Speed:
Every camera has a shutter, be it mechanical or electronic. The shutter remains closed, preventing light from reaching your image sensor. When you click the shutter button to take a picture, the shutter opens, allowing light to enter through your camera and onto the sensor. The amount of time it is open determines how much light is collected. The longer amount of time your shutter is open, the more light your sensor will gather, and vice versa, the shorter amount of time your shutter is open, the less light will be collected. The shutter speed is measured in fractions of a second – 1/500th, 1/250th, 1/125th, or for longer exposures, it is measured in full seconds – 8, 4, 2, etc. Notice that the examples are exactly half of the one before it. When you double the amount of time your shutter is open, you double the amount of light that enters – simple enough, right? So a photo with a 1/60th shutter speed is exactly half as bright as one with a 1/30th shutter speed, assuming all other settings are the same because 1/60th of a second is half the amount of time as 1/30th.
This halving (or doubling, depending on how you look at it) is referred to as a full “stop.” Each setting – shutter speed, aperture, and ISO, have these stops. A ‘full stop’ is halving or doubling the amount of light by altering one of the settings. Many cameras can be adjusted by 1/3rd stops for fine adjustment, but let’s concentrate on the full stop in this article for simplicity. “Stopping up” means to adjust your setting to allow more light in, and “stopping down” means to adjust your settings to allow less light in.
So for shutter speed, the common stops are as follows: (s = second)
1/4000s – 1/2000 s – 1/1000 s – 1/500 s – 1/250 s – 1/125 s – 1/60 s - 1/30 s – 1/15 s – 1/8 s – 1/4 s – 1/2 s – 1 s
For each change up or down, you change the exposure by one stop, either halving or doubling the amount of time the shutter is open, and thereby halving or doubling the amount of light that enters to the sensor.
Shutter speed not only affects the amount of light that enters the camera, but can also be used to freeze motion or blur motion. A very fast shutter speed, like 1/2000th, will “freeze” your subject’s action, whereas a slow shutter speed, such as a few seconds, will blur any movement in your photo.

In this example, the shutter speed was 1/2000th – notice the water drops are “frozen” in mid-air. 1/2000th, f/4, ISO 400

Shutter Speed – 1/125th, f/11, ISO 100
In this example, the shutter speed is 1/125th – Long enough to blur the runner’s legs and the background as I panned the camera right to left, but short enough to keep the runner’s face sharp.
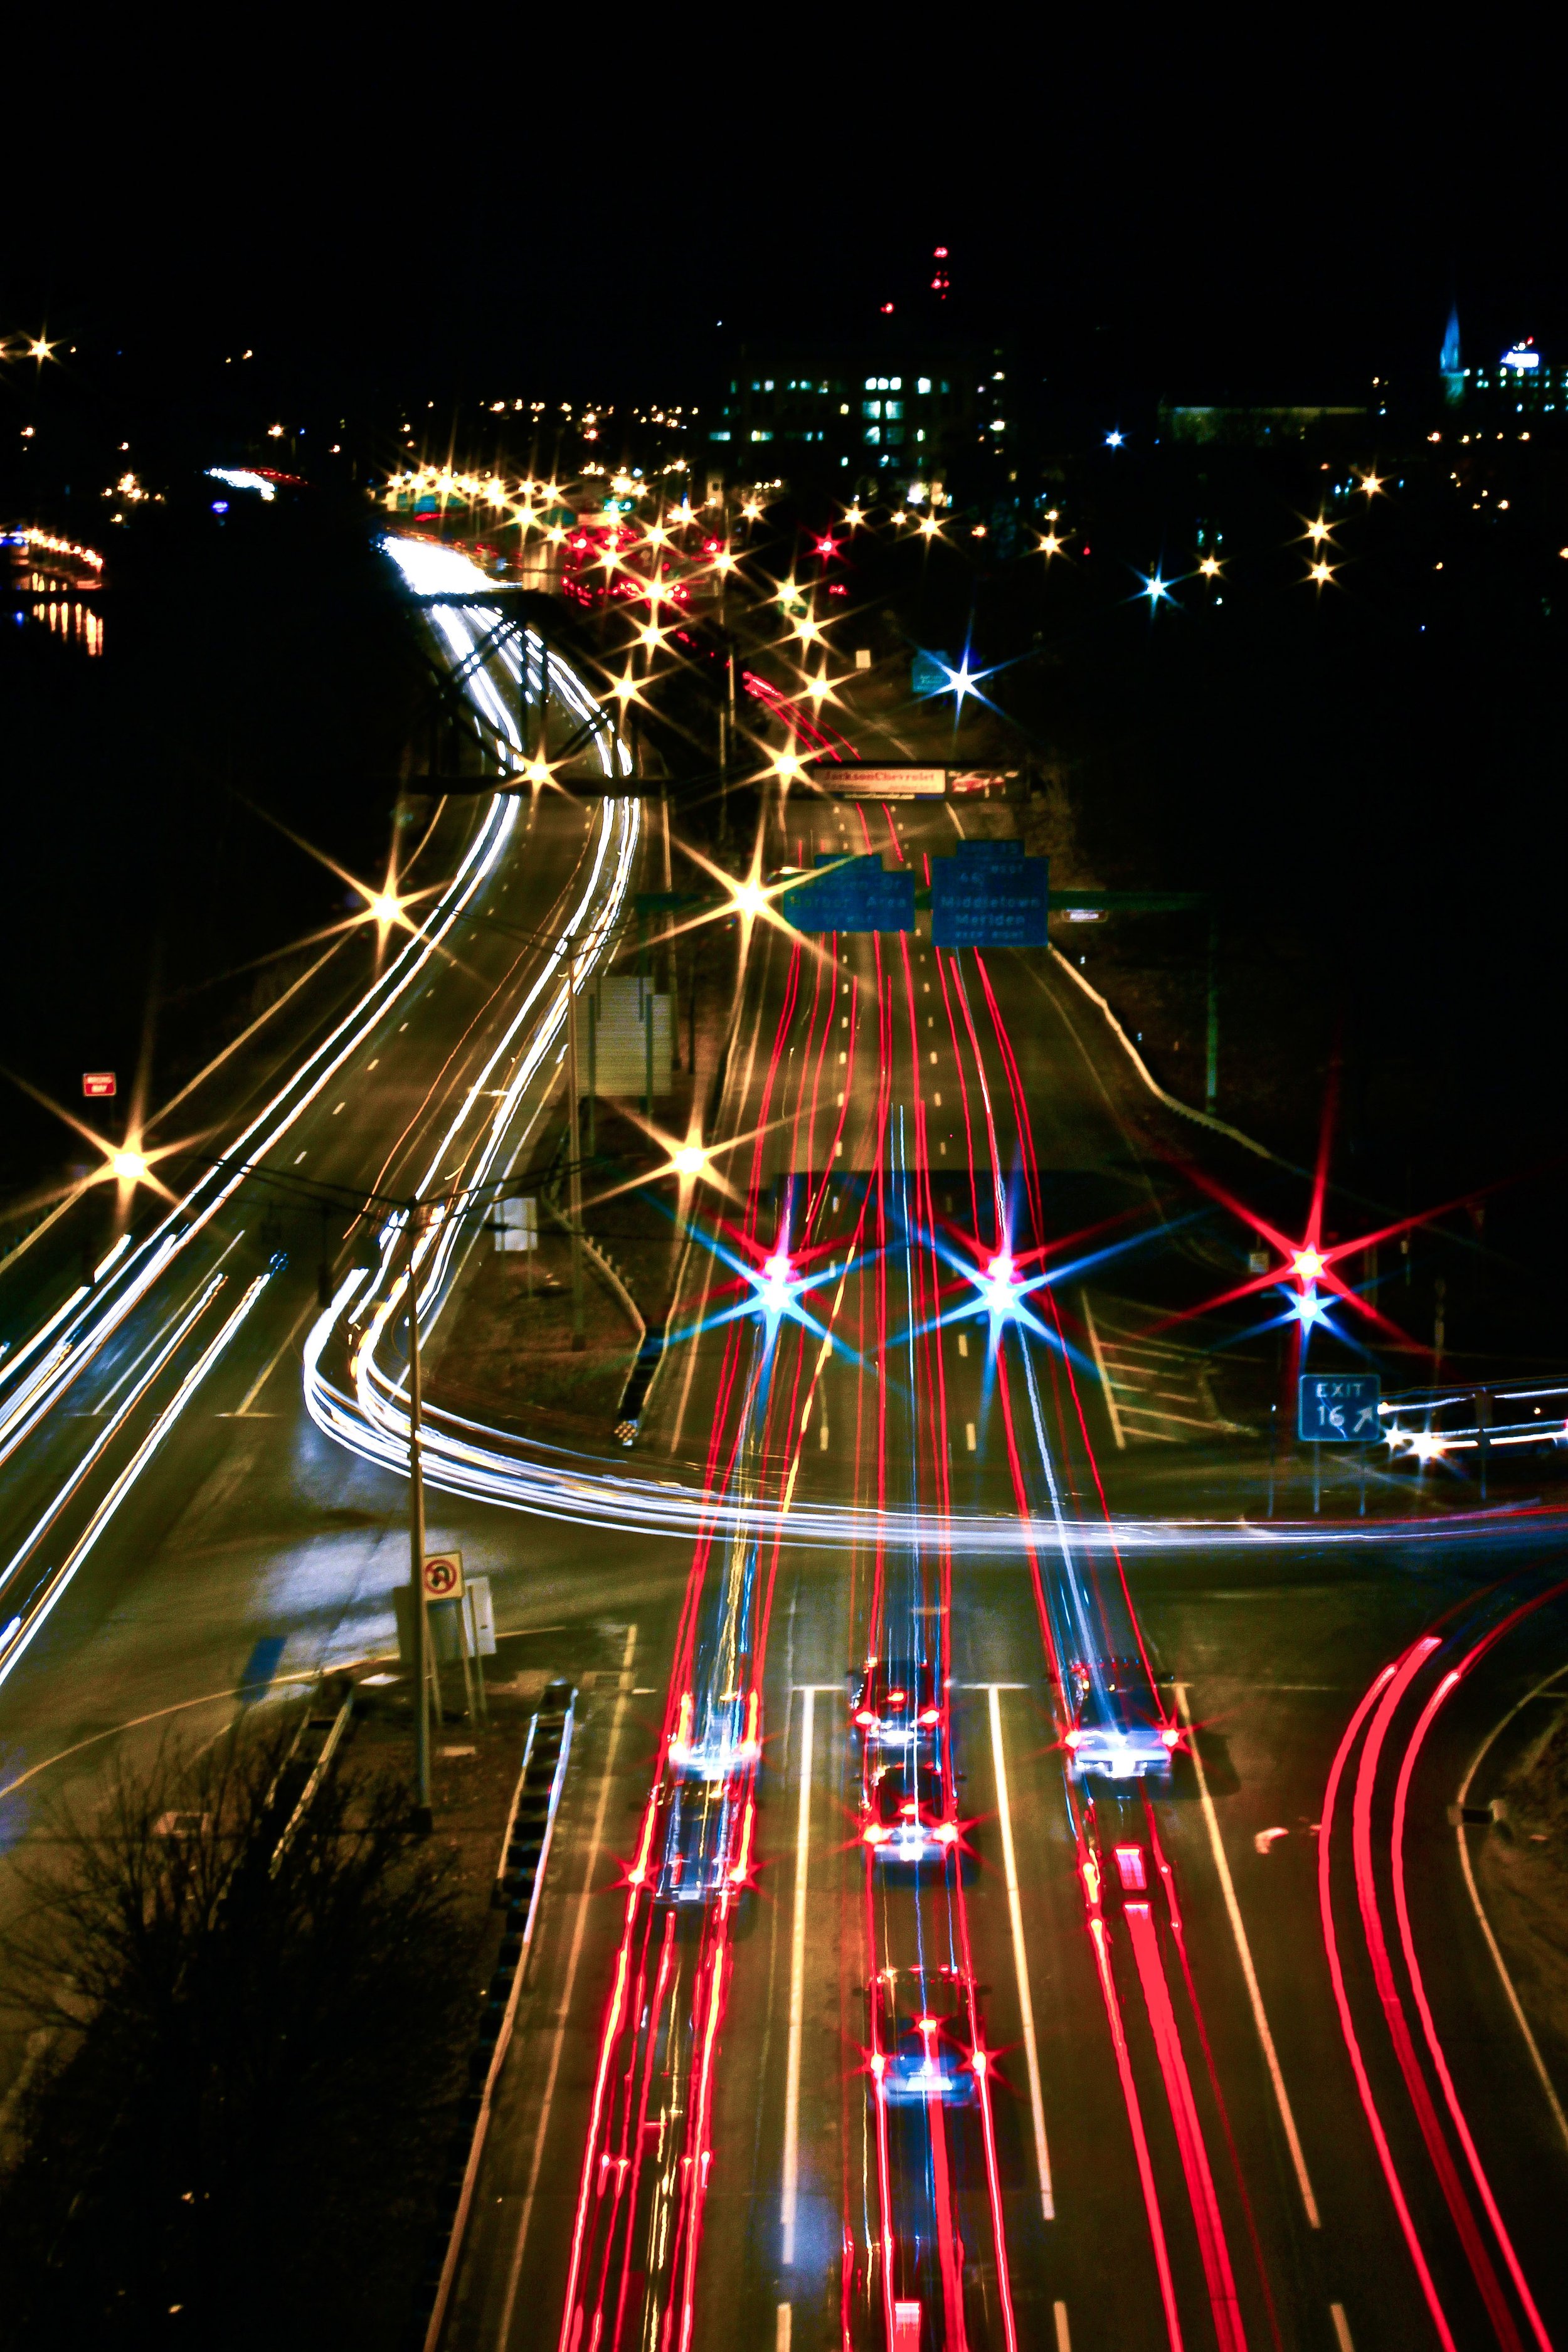
Shutter Speed – 30s, f/22, ISO 100
And in this example, the shutter speed was 30 seconds – very long, but it can yield interesting results like car headlights/tail lights leaving streaks of light (camera on tripod)
Aperture:
Aperture refers to a hole in a camera lens that light must go through to reach image sensor. Most camera lenses have variable apertures, to allow more or less light to enter depending on the photographer’s desired result. A large aperture will allow more light in, resulting in a brighter exposure – and a small aperture will result in a darker exposure due to less light being allowed into the camera (again, assuming all other settings are the same). Just like how shutter speed is measured in fractions of a second, aperture has a unit of measurement as well: the f-stop value. Aperture is measured in ‘f-stops’, which is the value of the focal length of a lens divided by the effective aperture diameter. Without getting into the nuts and bolts of it, know that f-stops can be a little confusing, because a large aperture (large hole, more light entering, brighter image) has a low f-number, and a small aperture (small hole, less light entering, darker image) has a higher f-number. F-numbers are also measured in full stops, much like shutter speed, and each full stop change either halves or doubles the size of the hole in the lens (the aperture), and thereby halves or doubles the amount of light that enter to the sensor. Note that f-stops are not as cut and dry as the stops of shutter speed. This is because f-stops are a geometric sequence that correspond to the powers of the square root of 2 instead of a simple measurement of time, which is the case with shutter speed. Below are the common full f-stops:
f/1 (largest aperture, most amount of light enters) – f/1.4 – f/2 – f/2.8 – f/4 - f/5.6 – f/8 -f/11 – f/16 – f/22 - f/32 (smallest aperture, least amount of light enters)
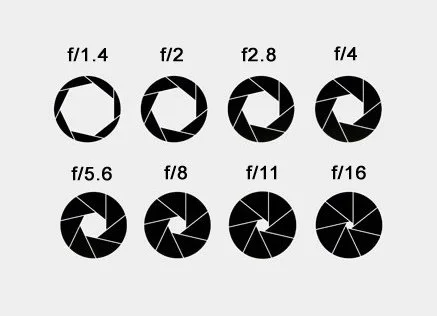
Aperture Diagram
Without getting into the mathematics of it, you can see that the f-stop values aren’t as simple or easily memorized as the stops of your shutter speed. So stopping from f/8 to f/4 will not cut the amount of light entering by half, which may seem intuitive. Look at the table above – it actually quadruples the amount of light entering since f/4 is two full stops larger than f/8.
Just like shutter speed has the “side effect” of blurring motion or freezing motion, aperture not only effects the amount of light that enters the camera, it also affects the depth of focus. Depth of focus refers to the distance from the nearest and farthest points in a photo that are sharp. A small (or shallow) depth of focus will have out of focus foreground and background elements, keeping only the subject sharp, whereas a large (or deep) depth of focus will have most, if not all of the picture appear sharp. A large aperture, such as f/1.4 or f/2 will result in a shallow depth of field, and a small aperture such as f/16 or f/22 will result in a very deep depth of focus. Keep in mind that depth of field is determined by other factors as well, like your lens’s focal length and the distance from your subject – but in these examples, we’ll just concentrate on how aperture affects depth of field.
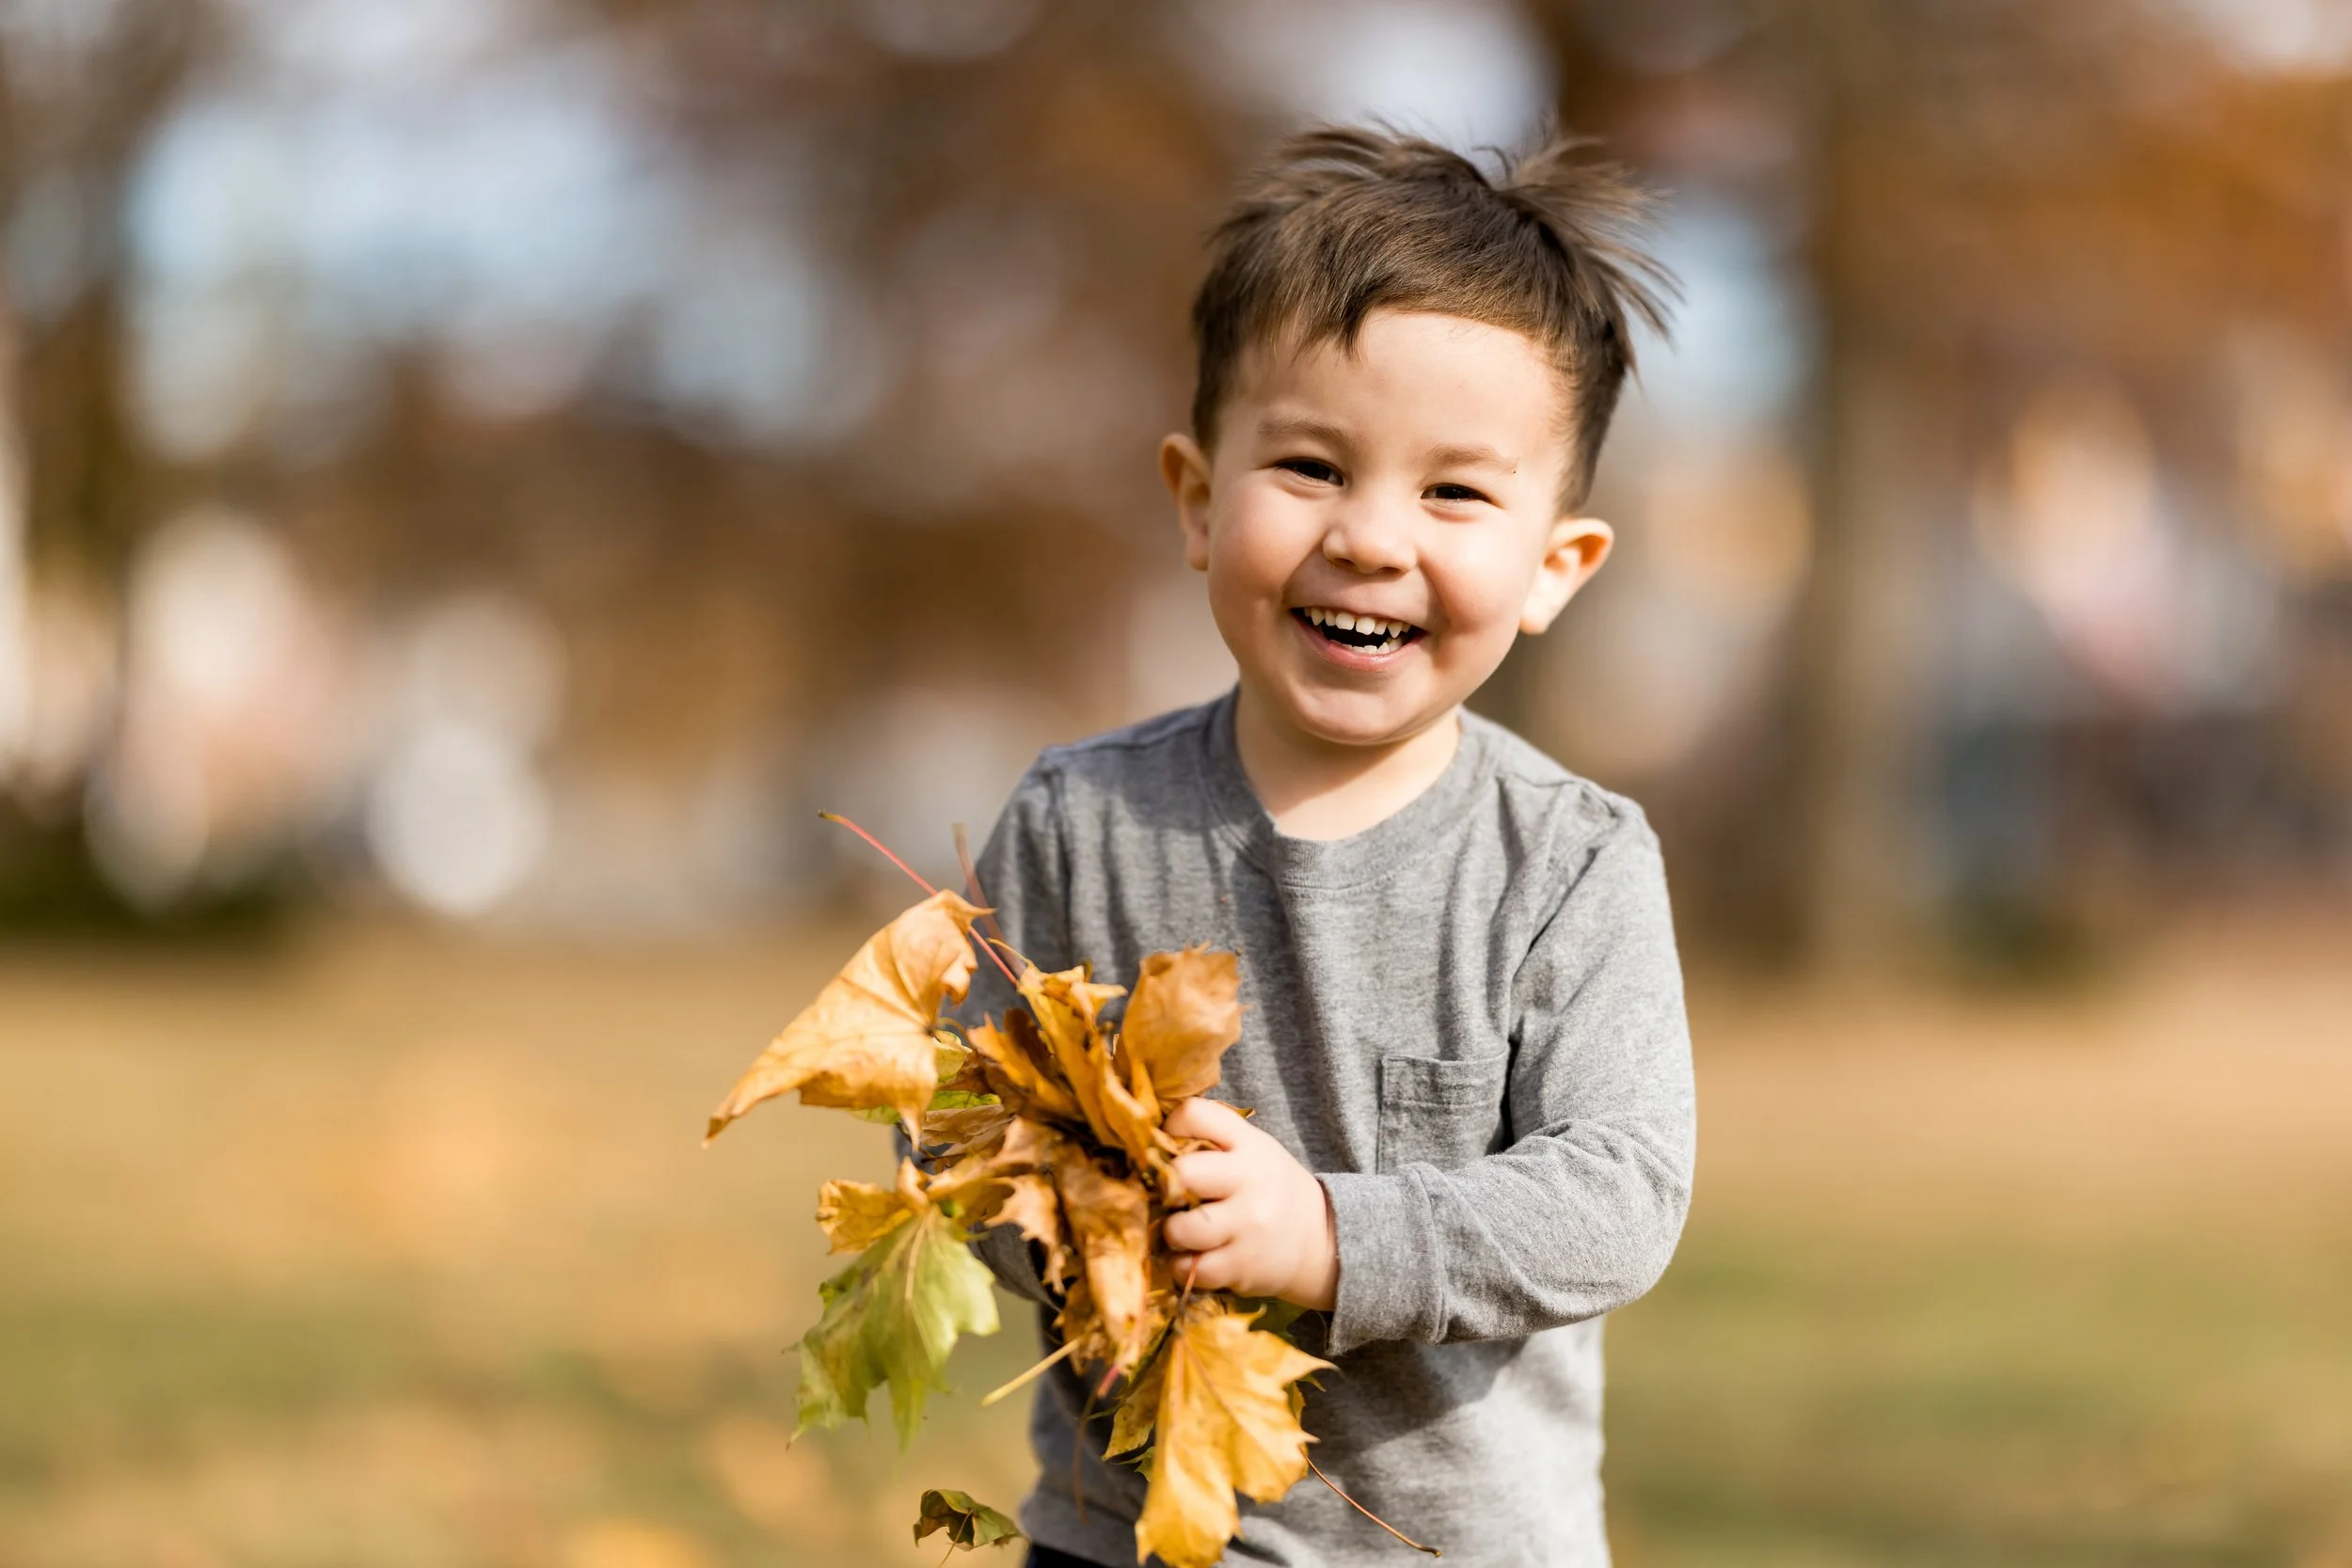
f/1.2, SS 1/8000s, ISO 100
This example was shot at f/1.2, resulting in a very shallow depth of focus – the kiddo is in focus, but the background is very blurred.

f/11, SS 1.0s, ISO 100
And in this example, f/11 was used – see how everything from the nearest table to the farthest stack of books are in focus
ISO:
ISO refers to how sensitive the film or digital sensor is to light. Just like how aperture has its f-stops, ISO is measured in “speeds.” While ISO is complicated to fully understand, applying it to your photographs is much easier. Essentially, the higher the ISO, the more sensitive your sensor is to light, and the brighter the resulting image will be. Below is a table for the speeds of ISO – they act just like the full stops of a shutter speed or aperture, where a change up or down will result in a halving or doubling of the gathered light.
ISO 100 - ISO 200 – ISO 400 – ISO 800 – ISO 1600 – ISO 3200 - ISO 3200 - ISO 6400
Many cameras can go higher than ISO 6400, but the full-stop-doubling progression is still the same (12800, 25600, etc.) For a bright, sunny day, ISO 100 or 200 will usually do the trick, but in a dark indoor room for instance, you will need to raise your ISO to gather more light.
Just like with the motion blur of shutter speed, and depth of field of aperture, ISO affects something other than just the amount of light that is gathered. Grain, or digital noise becomes apparent more so with higher ISO speeds. ISO 100 will result in a smoother, cleaner, less grainy picture than one shot at ISO 6400. Underexposed images also tend to look grainier than overexposed images, regardless of what ISO you’re using.

ISO 12800, SS 1/200th, f/2.0
This photo was shot at ISO 12800 – note the amount of grain and digital noise, especially in the shadows

ISO 100, f/8, ISO 400
And this one is shot at ISO 100 – note there is very little noise, even in the dark areas.
Bringing It All Together:
So now that you understand how the three elements of exposure affect the picture, it’s time to put them all together. In order to attain a “correct” exposure – one that isn’t too bright nor too dark – you need the correct combination of the three elements. You must first decide what you want your picture to look like – this will determine which of the three elements will take precedence over the others.
For example, if you want a photograph of a babbling brook where the water looks very wispy and flowing, you will want your shutter speed to be slow – one to four seconds, let’s say (in this example you will need to have a tripod or other steady surface to rest your camera on). From there, you can adjust your aperture and ISO. To attain such a slow shutter speed (during the day, at least), you will need to stop down your aperture – set it to f/22 or so, and lower your ISO to 100. Assuming you’re using a steady tripod, your resulting photo should look something like this:
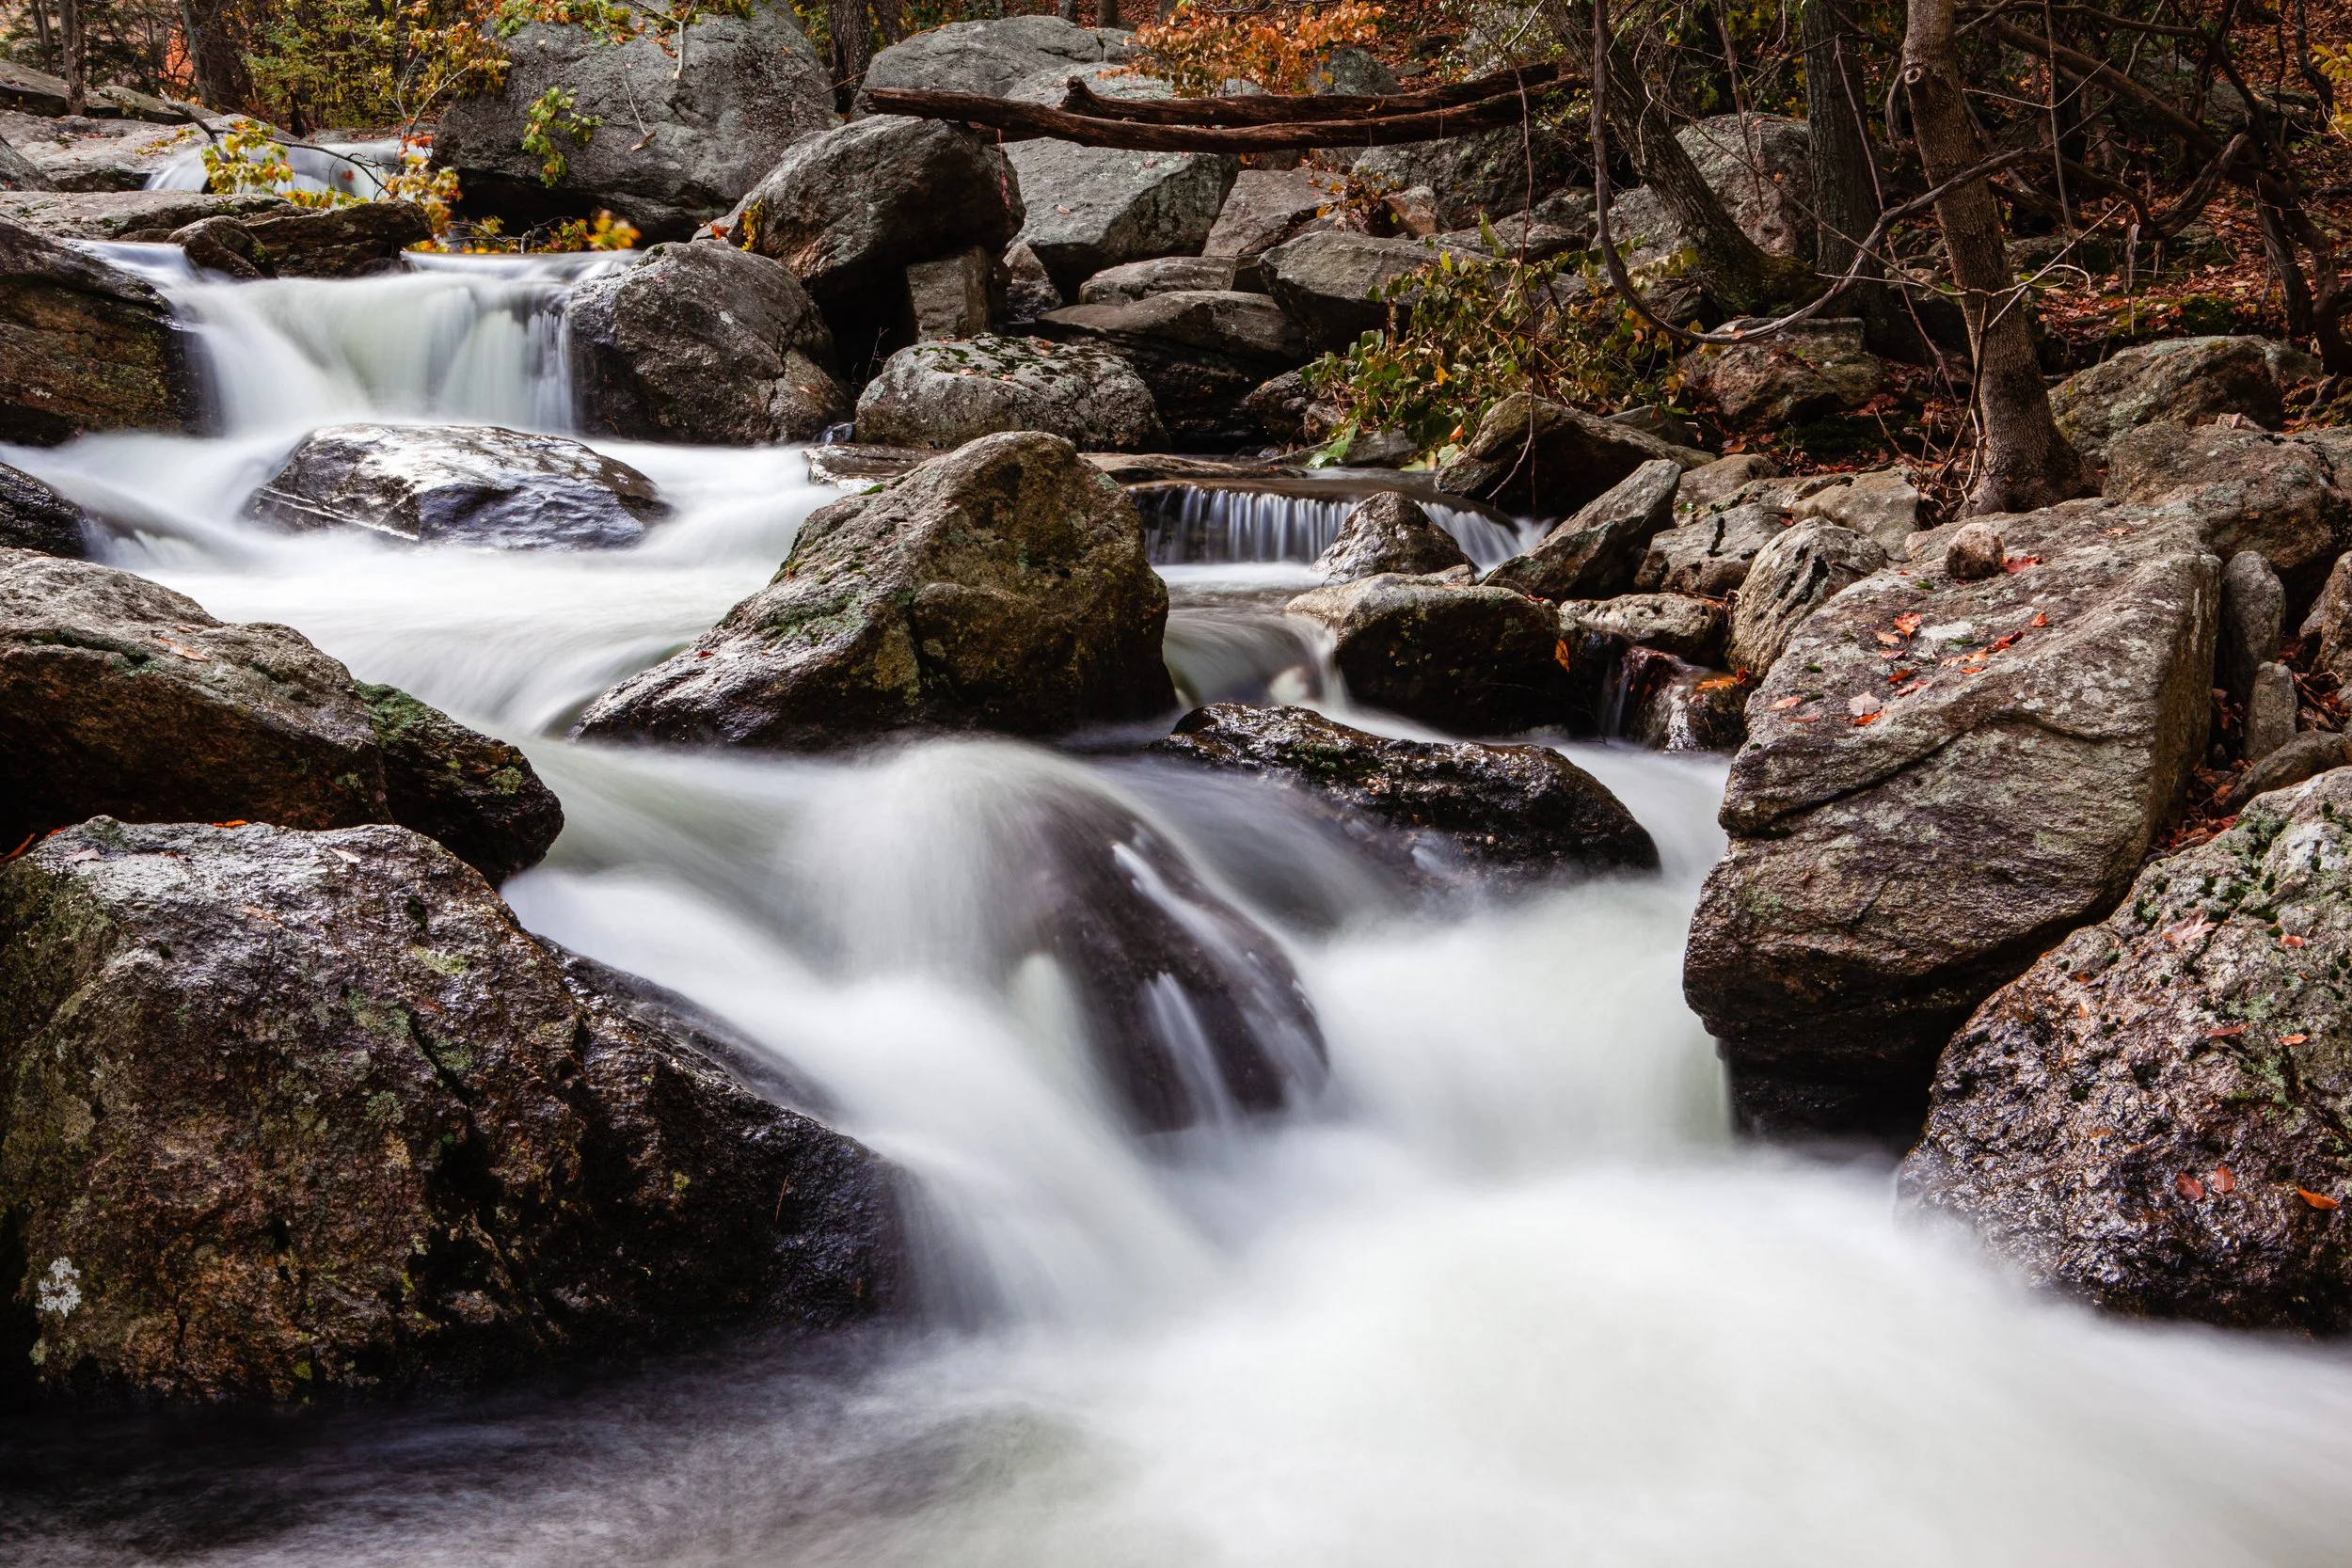
f22, ISO 100, SS 3.2s
Notice that everything from the foreground to the background is in focus due to the small aperture, and the slow shutter speed blurred the motion of the water. The low ISO resulted in a very clean image with very little noise.
For sports or other fast moving action, you will likely want to freeze the motion, so a fast shutter speed is what you want. Assuming you’re outdoors with plenty of light, you will use a fast enough shutter speed to freeze the action, and you can adjust your aperture and ISO accordingly. I prefer to use the lowest ISO possible for the highest quality images, but only if I don’t have to sacrifice another variable.
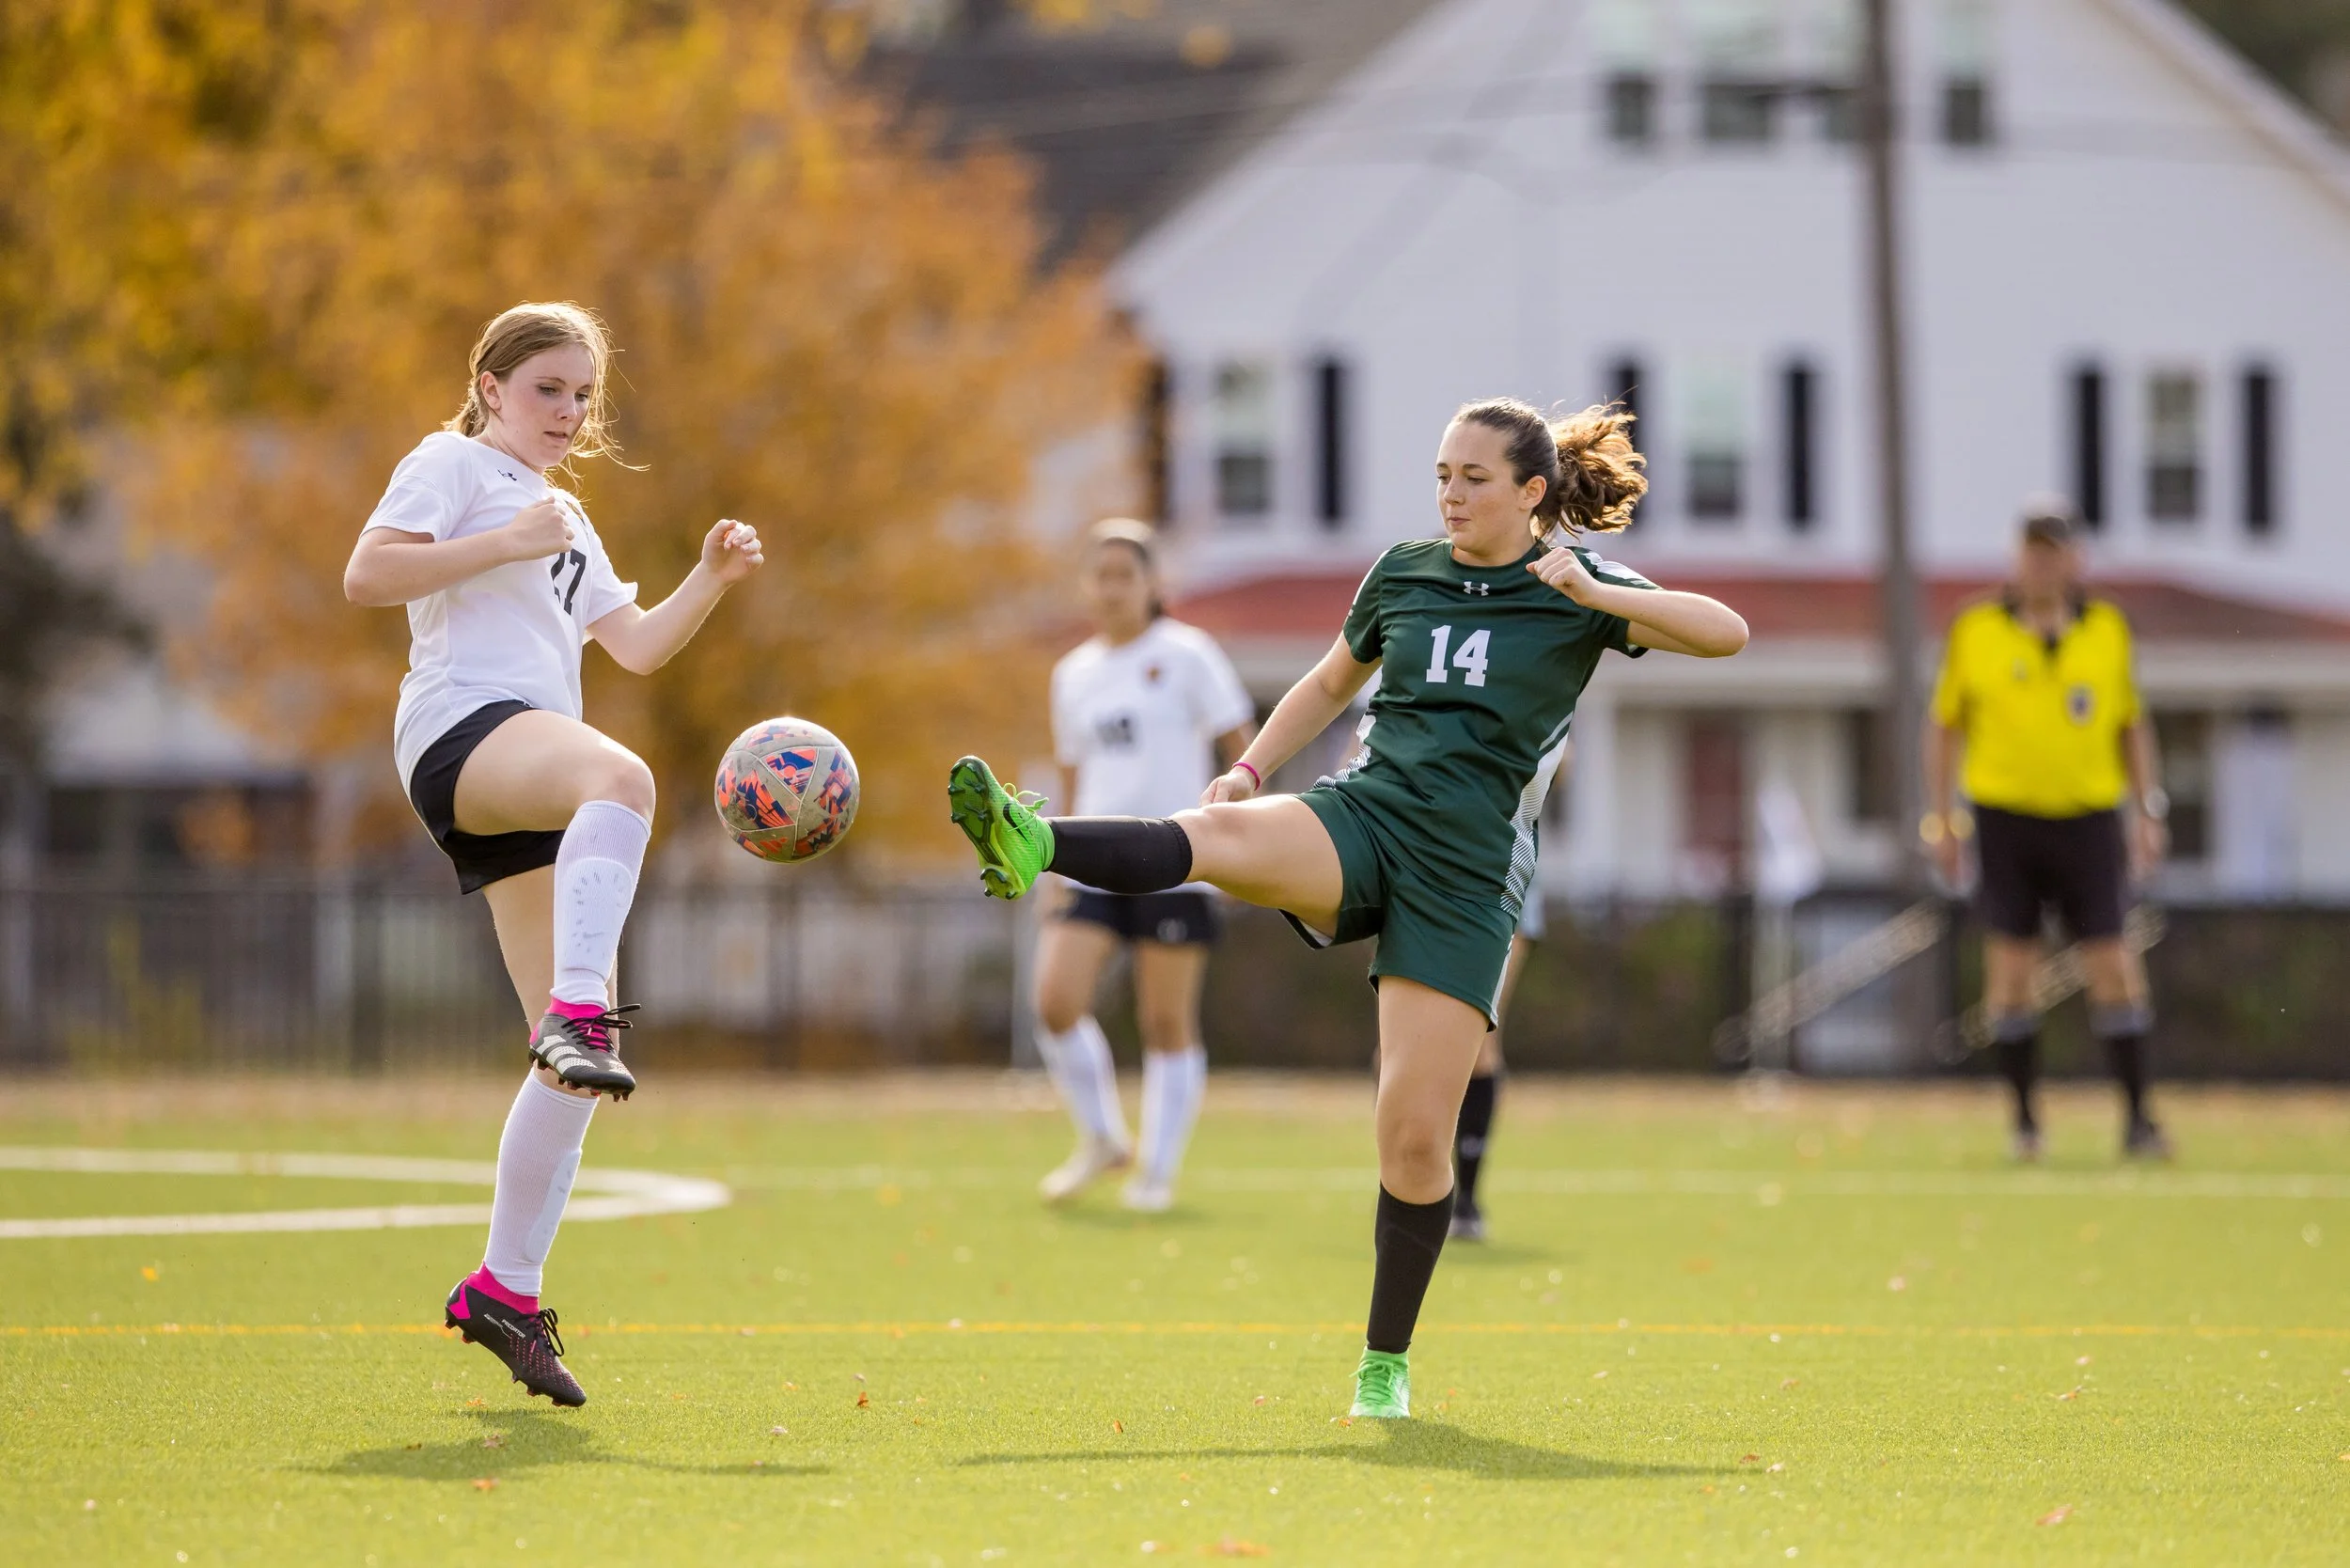
1/8000th, f/2.8, ISO 800
Notice the soccer ball is really frozen in mid-air, and I’ve isolated the players with a shallow depth of field created by shooting at a large f/2.8 aperture.
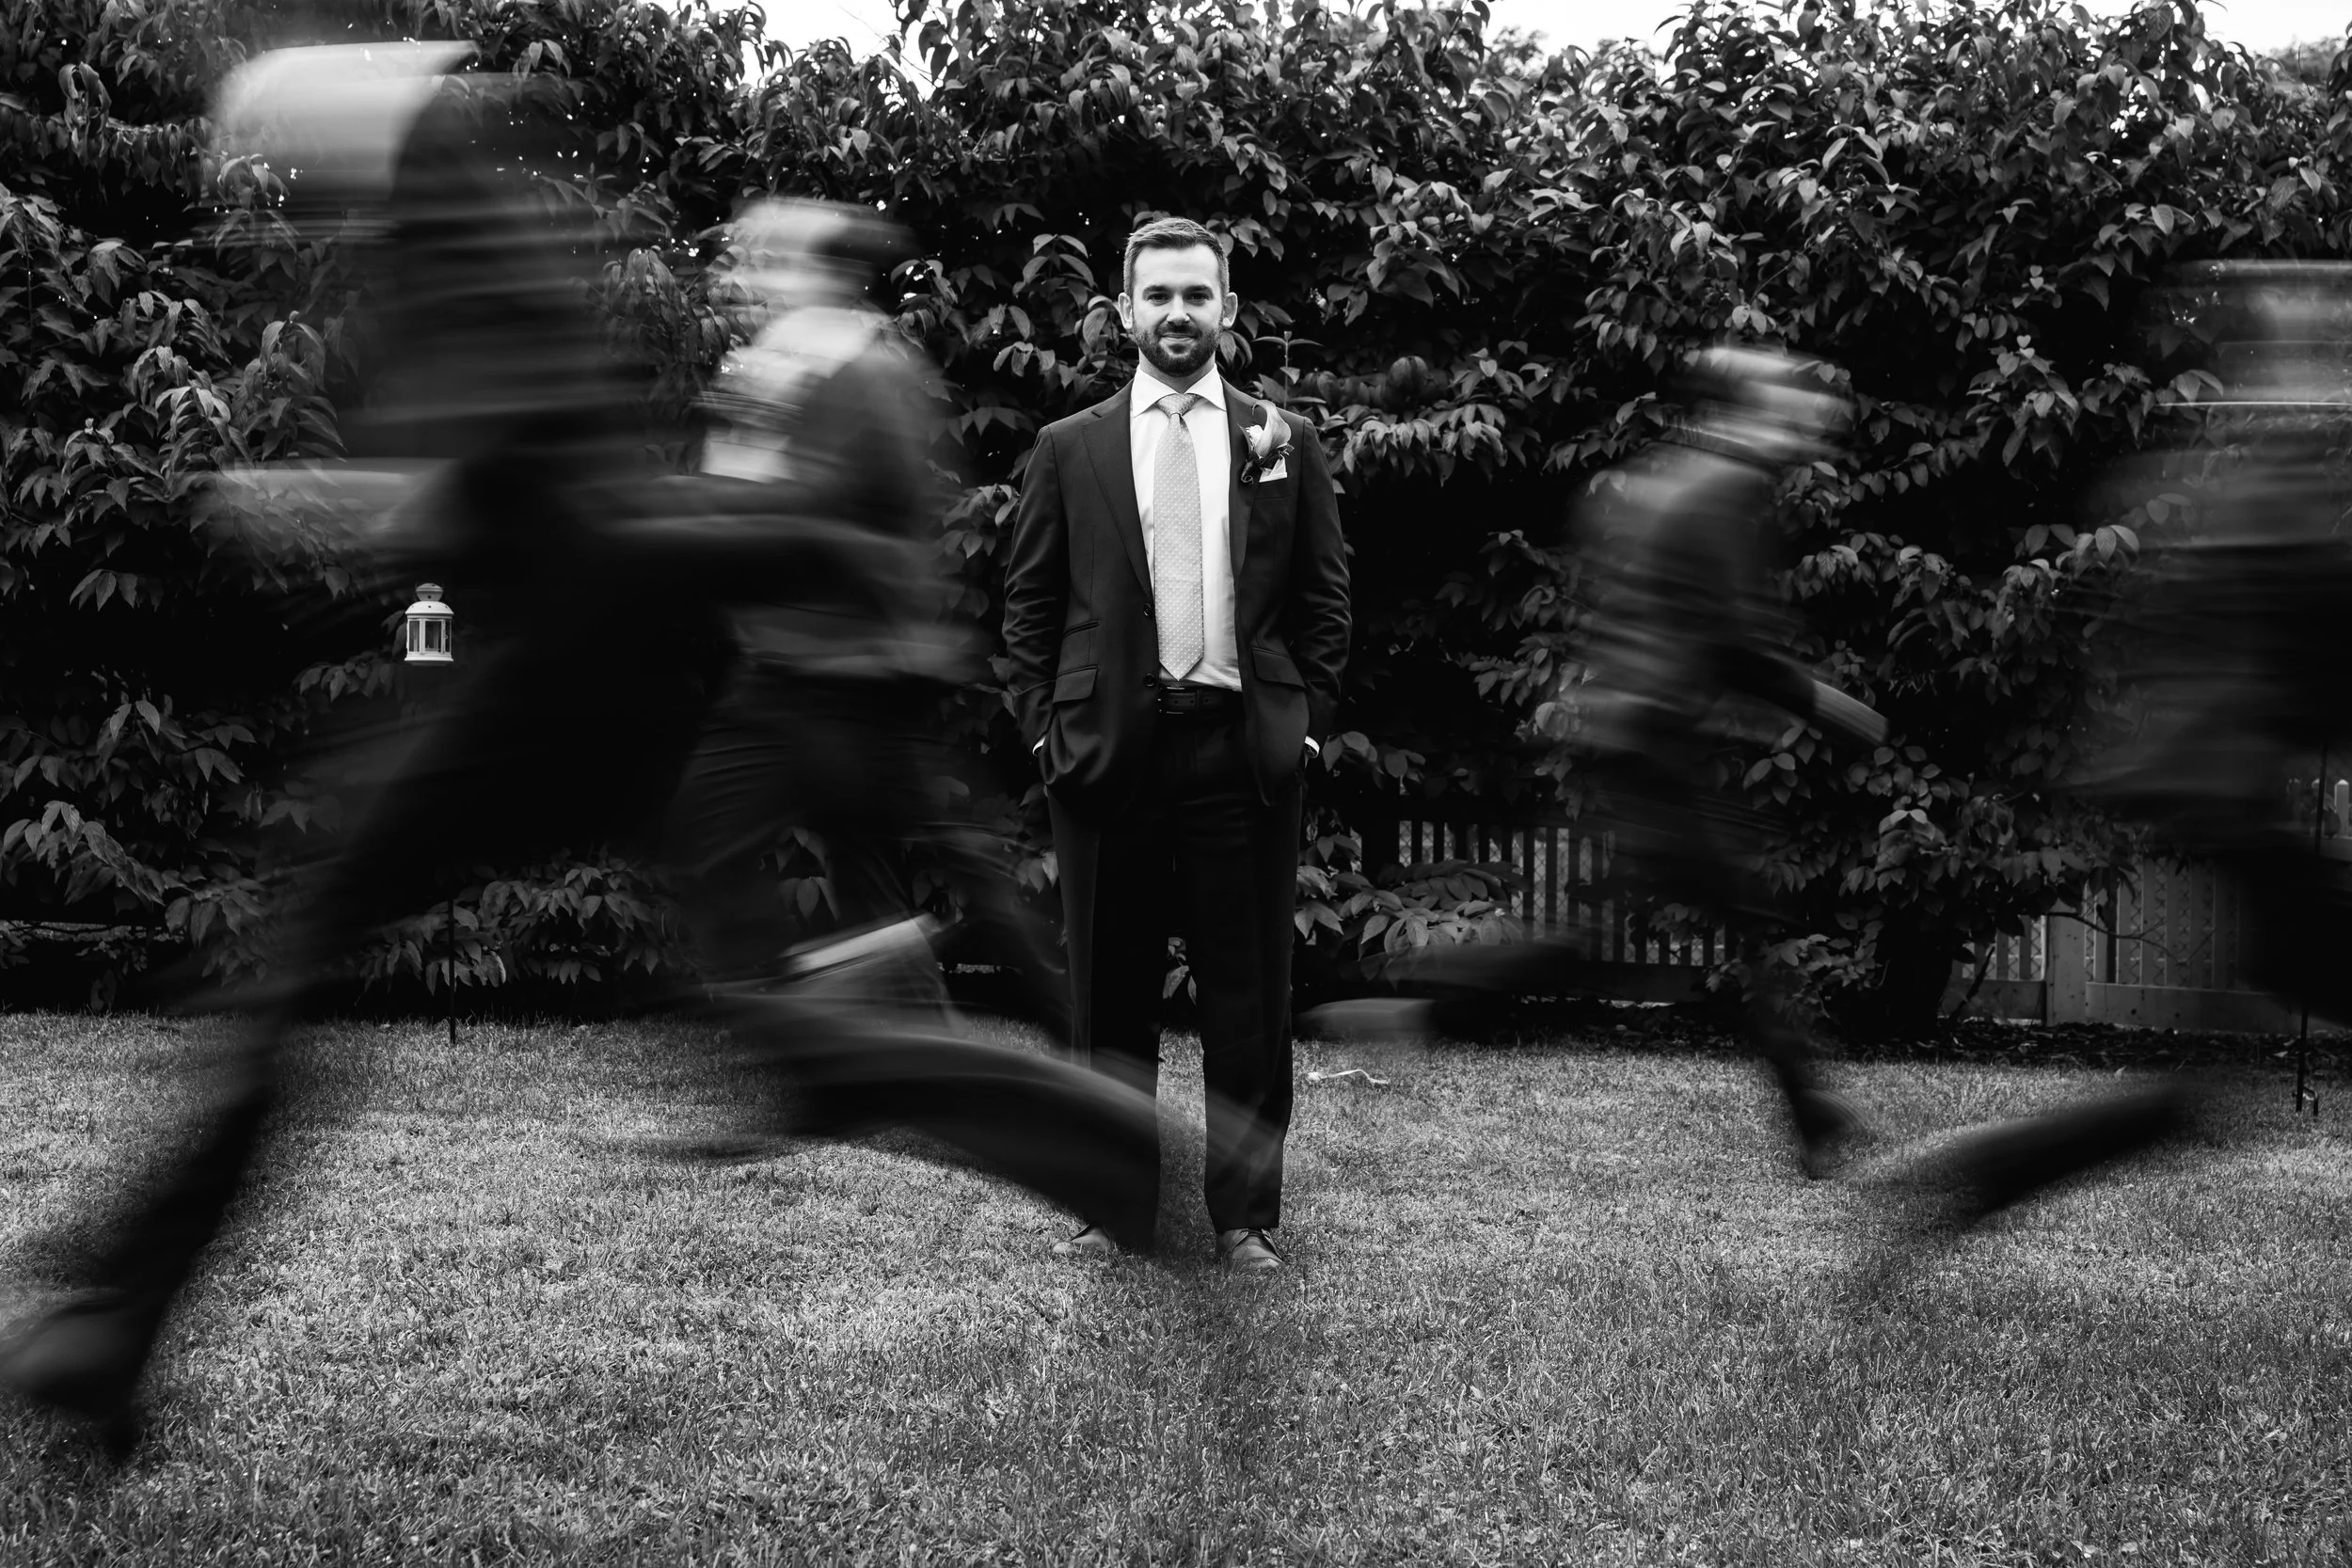
f/10, ISO 100, 1/20th
Here, I held the camera steady, told the groom to stand still, and instructed his groomsmen to run past him in front, and behind. The slow shutter speed blurs the groomsmen, but is fast enough to keep the groom sharp while standing still.

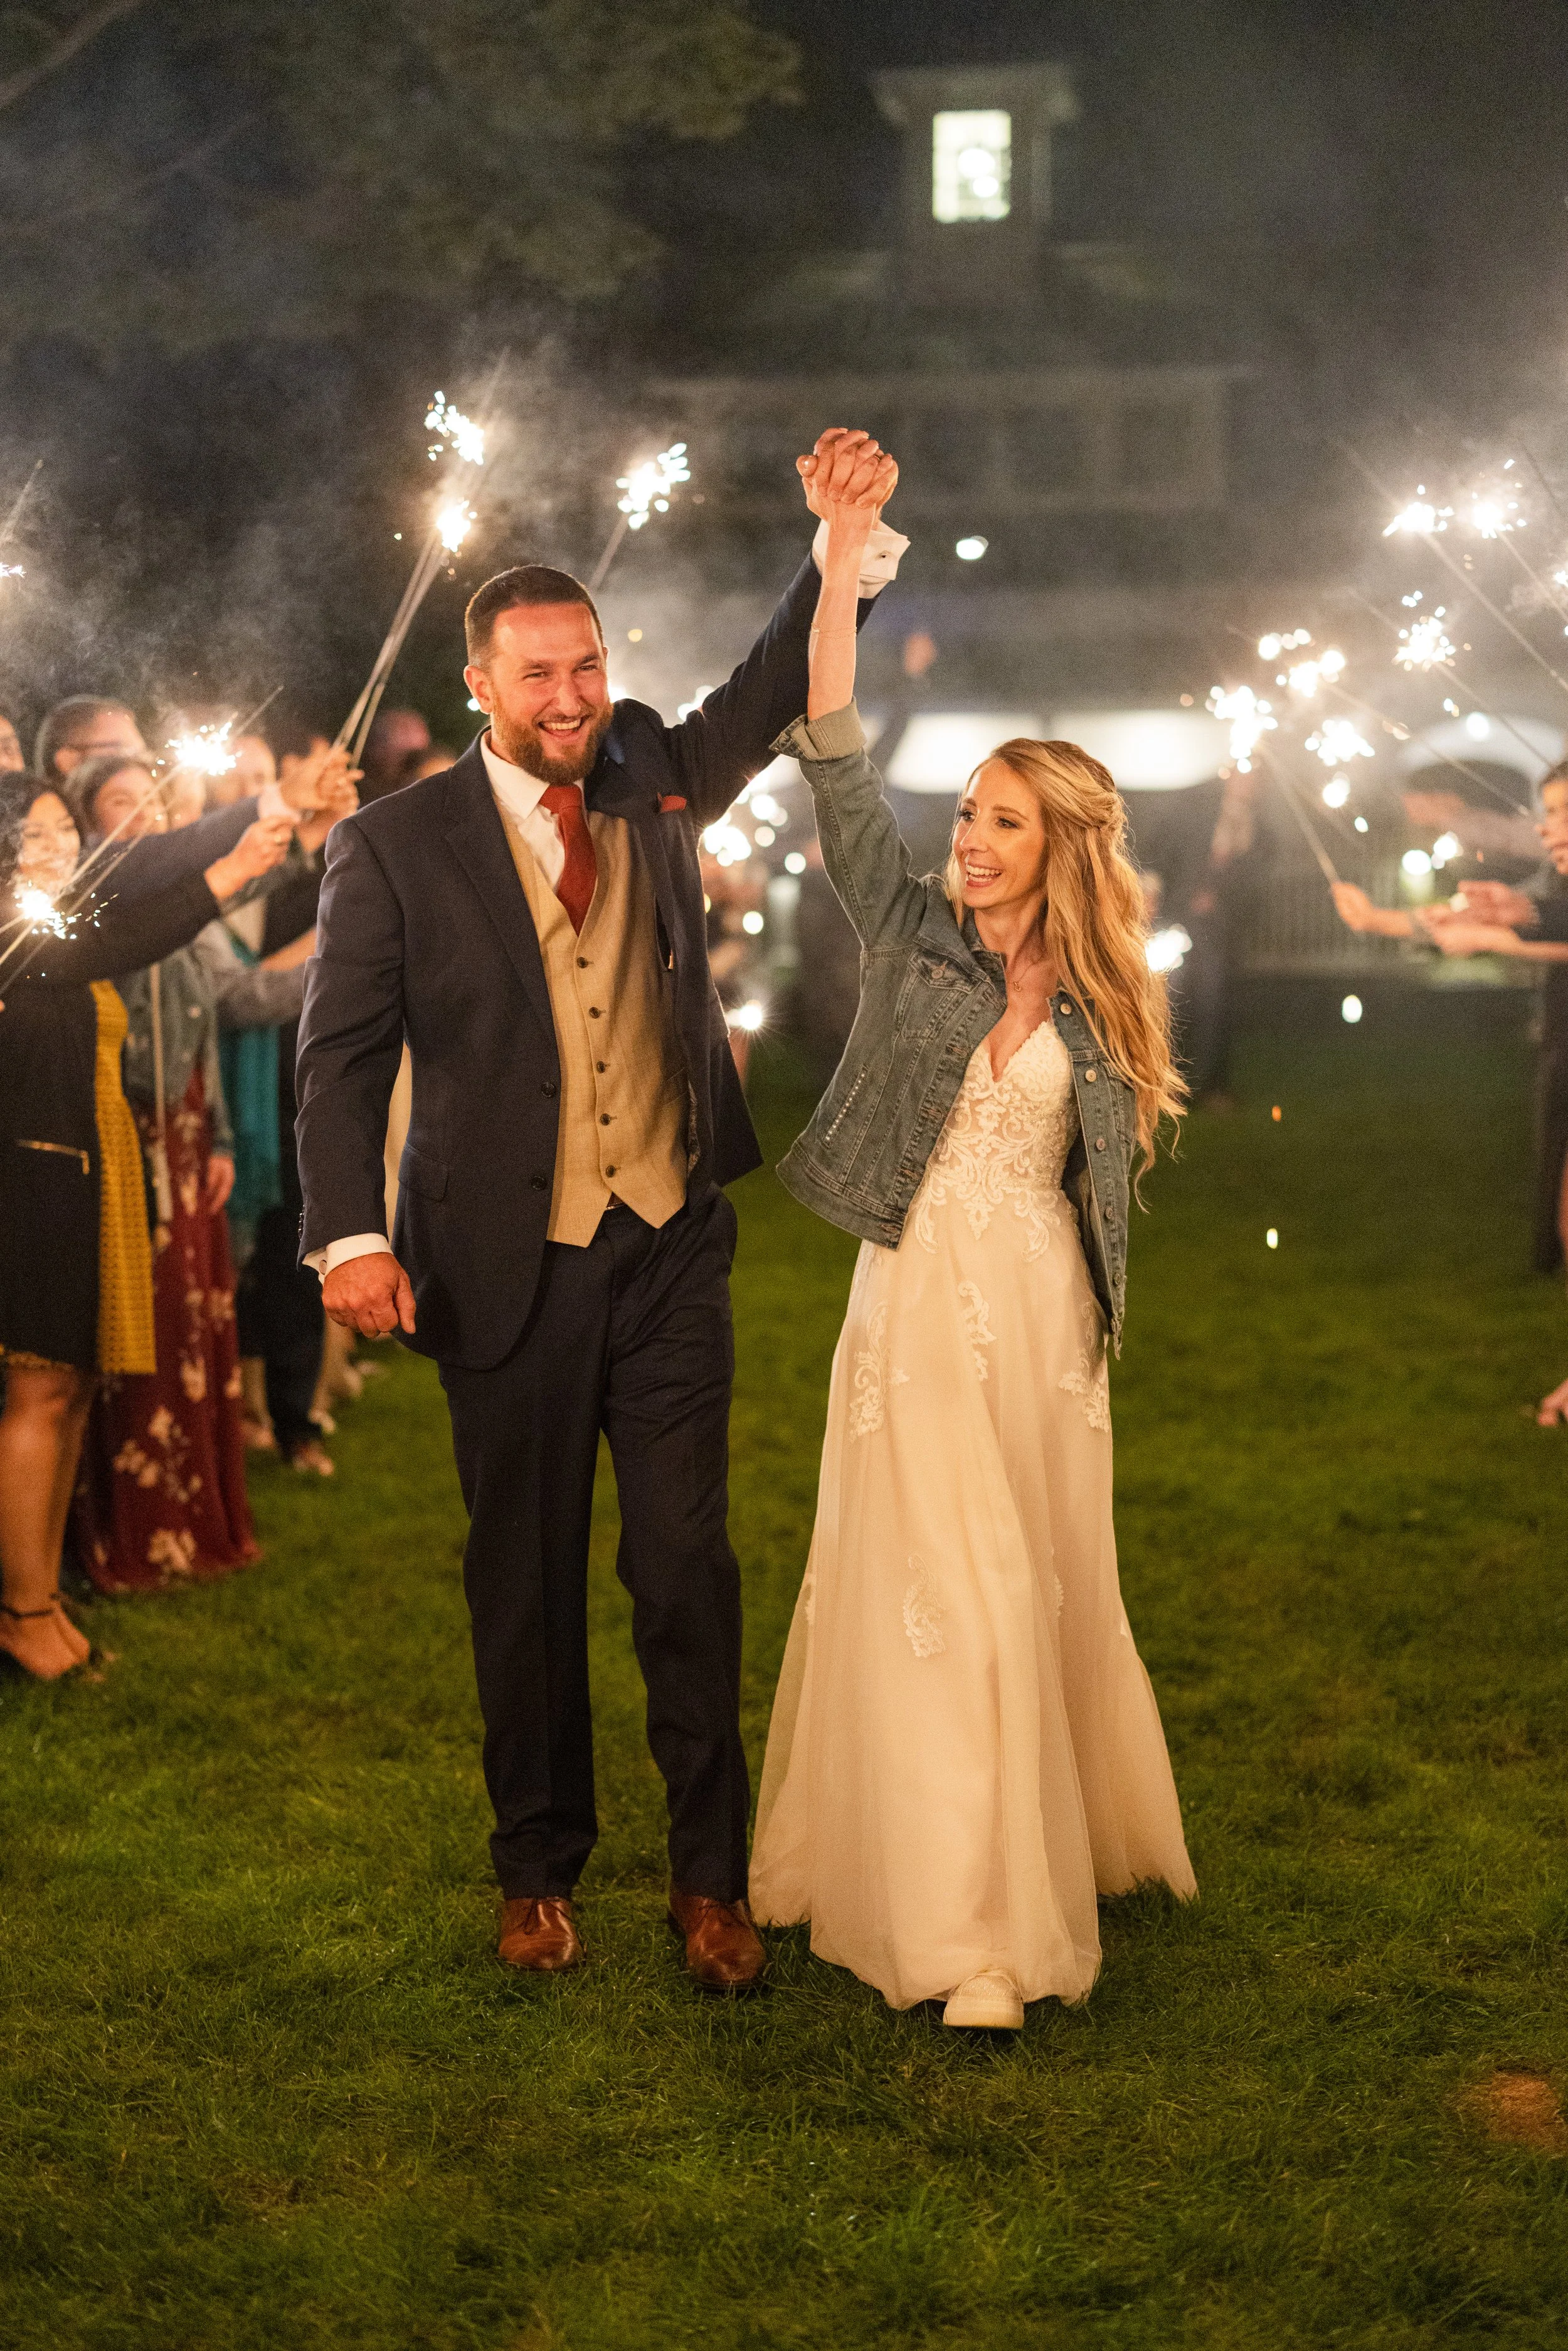
ISO 500, f/5, SS 1/5th
You can also freeze motion with a flash or strobe. Here, I used an on camera flash to freeze the people dancing closer to me, while moving the camera to capture the blur and trails of the lights behind them. Using flash introduces many new techniques, and this is just an example of one of them.
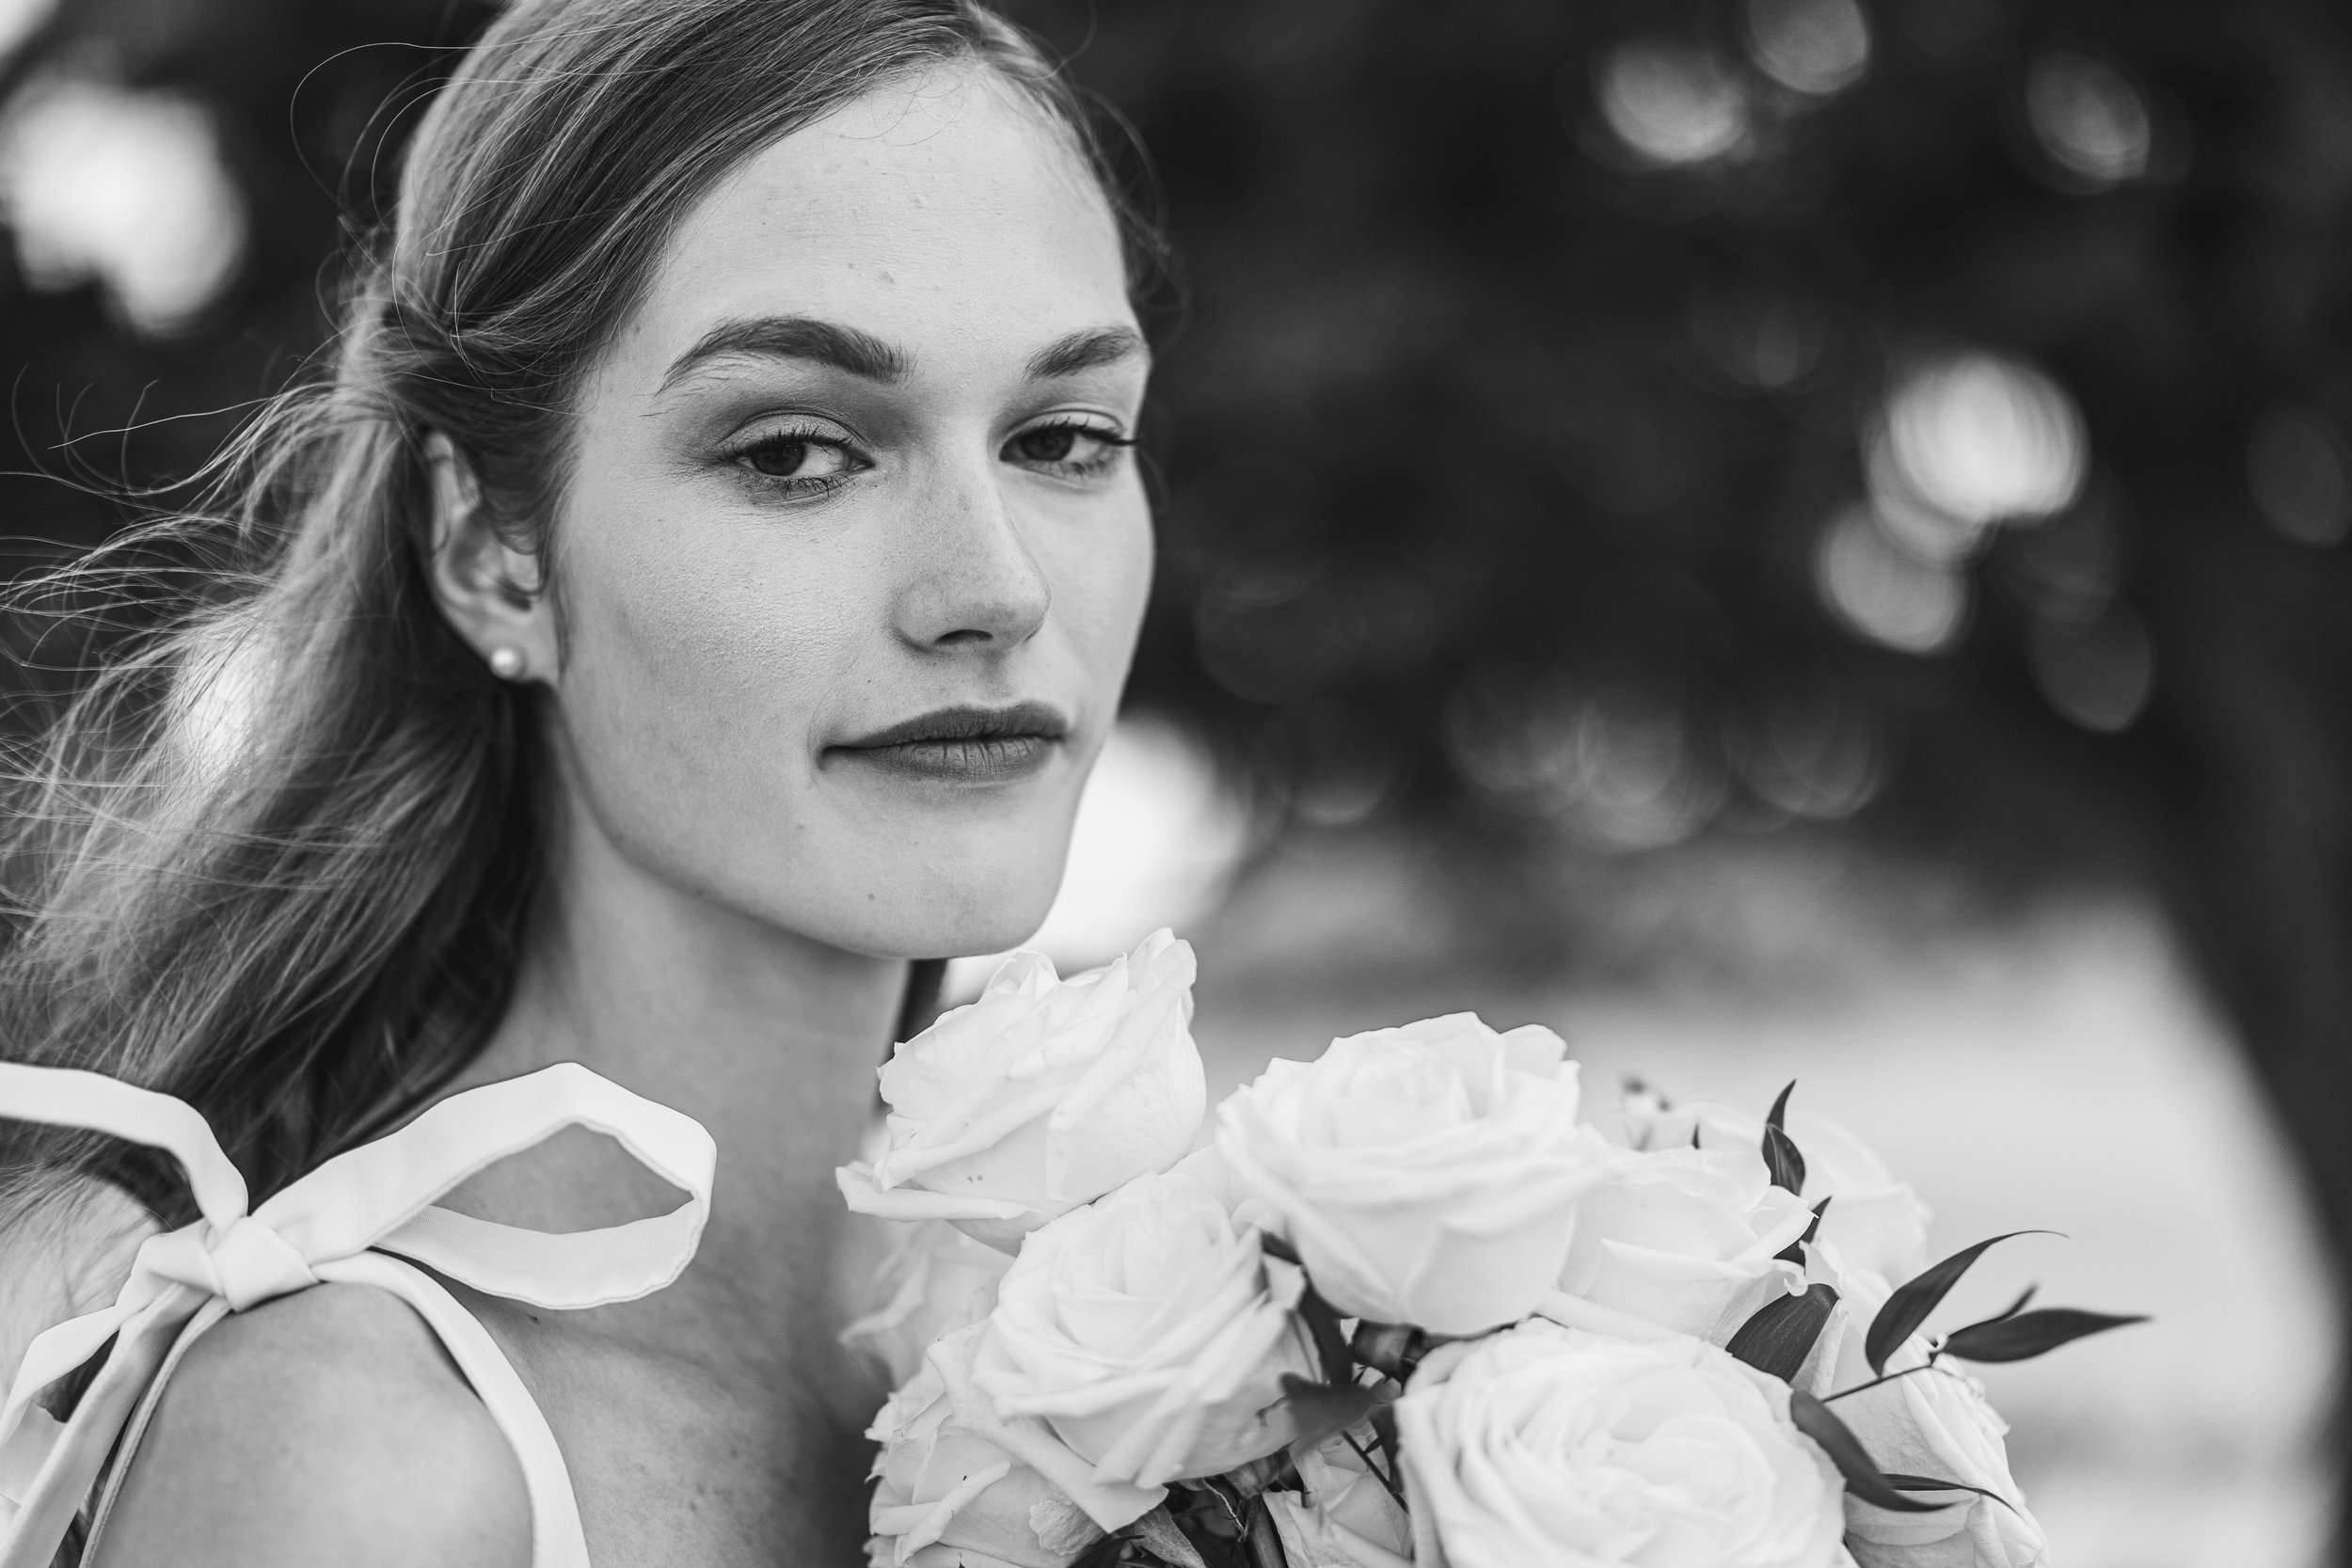
f/1.4, 1/2000th, ISO 400
In this example, I really wanted to draw the focus to the bride’s eyes, so I used a large aperture to attain a very thin depth of field in order to isolate her from the background.
1/200th, ISO 6400, f/1.4
Pushing the limits a bit - high ISO, wide open aperture, and a shutter speed that is just high enough to freeze motion while the couple is walking.
Sometimes the conditions simply won’t allow you to get the desired result you want. A good example of this is indoor sports in a poorly lit arena or hall. This can be a very difficult thing to photograph because there often isn’t enough light to work with. You can open your aperture as large as it can open and raise your ISO as high as your camera will allow, and to get a proper exposure, you may have to have a shutter speed of 1/30th, which certainly isn’t fast enough to freeze the action of a fast moving basketball or hockey player. Having a tripod or lens with image stabilization won’t help either, because your subject (the player) is moving very fast, not just your camera shake. This is where equipment really can make a difference – “faster” lenses (those with larger maximum apertures) are helpful because they can let more light into the camera, allowing for faster shutter speeds. Higher quality cameras with better sensors can allow for higher ISOs with less noise than lesser quality cameras. And while I adopt the philosophy that better gear doesn’t make one a better photographer, having the right tool for the job certainly can result in more pleasing images.
Here is another example – if you’re taking a portrait outdoors on a bright, sunny day and you want to get a really thin depth of field to isolate your subject from his/her background. So you open your aperture as wide as it will open, but then you realize your ISO is at its lowest and your shutter speed is at its highest and you’re still overexposed. You have no choice other than to stop down your aperture, resulting in a deeper depth of focus, and thus not separating your subject as well as with a wider aperture’s thin depth of focus. Again, having the right tool for the job can save you. A neutral density filter can screw onto the end of your lens, and it basically acts like sunglasses with no color tint, which allows for slower shutter speeds and/or wider apertures.
These are a just a few examples of how shutter speed, aperture, and ISO must all work together to not only give you a correct exposure, but also to get your desired result, whether it be more or less motion blur, depth of focus, or grain/noise. When you change one setting, you must change another to maintain the same exposure. Often times compromises must be made; it’s all part of being a versatile photographer. Knowing what you want your picture to look like and what your settings must be in order to achieve that look requires practice. The great thing about digital photography is that you can experiment as much as you want without the fear of wasting money on film and developing costs. It’s also great to be able to review your image immediately right there on your camera. So grab your camera, switch it to manual mode, and start experimenting!
